


 |
| Yes, you read it right, I'm an addict. I can't stop. I just keep clicking away, wanting to get that perfect shot. The problem is, I usually get lots of them. Maybe not perfect, but so loved by me. Scrapbooks have really evolved over the years. They used to be mostly a bunch of pictures in rows in a book, with a name or date scribbled next to it, sometimes. But open any scrapping magazine today, and they are filled with beautiful works of art. Pages that take hours, days, or even weeks to finish. Scraplifting is something we all like to do from time to time, but its so hard for me. Because of my addiction. You see, most of the pages being created today only have one picture per page. I. Just. Can't. How can I narrow down my lovely piles of photos to just one picture? I simply can't do it most of the time. So, in case you are a little like me, and love all your photos, here's a few pages to spur your creativity. Some of them have been scraplifted by me, but most are my own creations. Lots of these pages adorned the walls of my store, Paper Trails, so a few of you might recognize some of them. |
 |
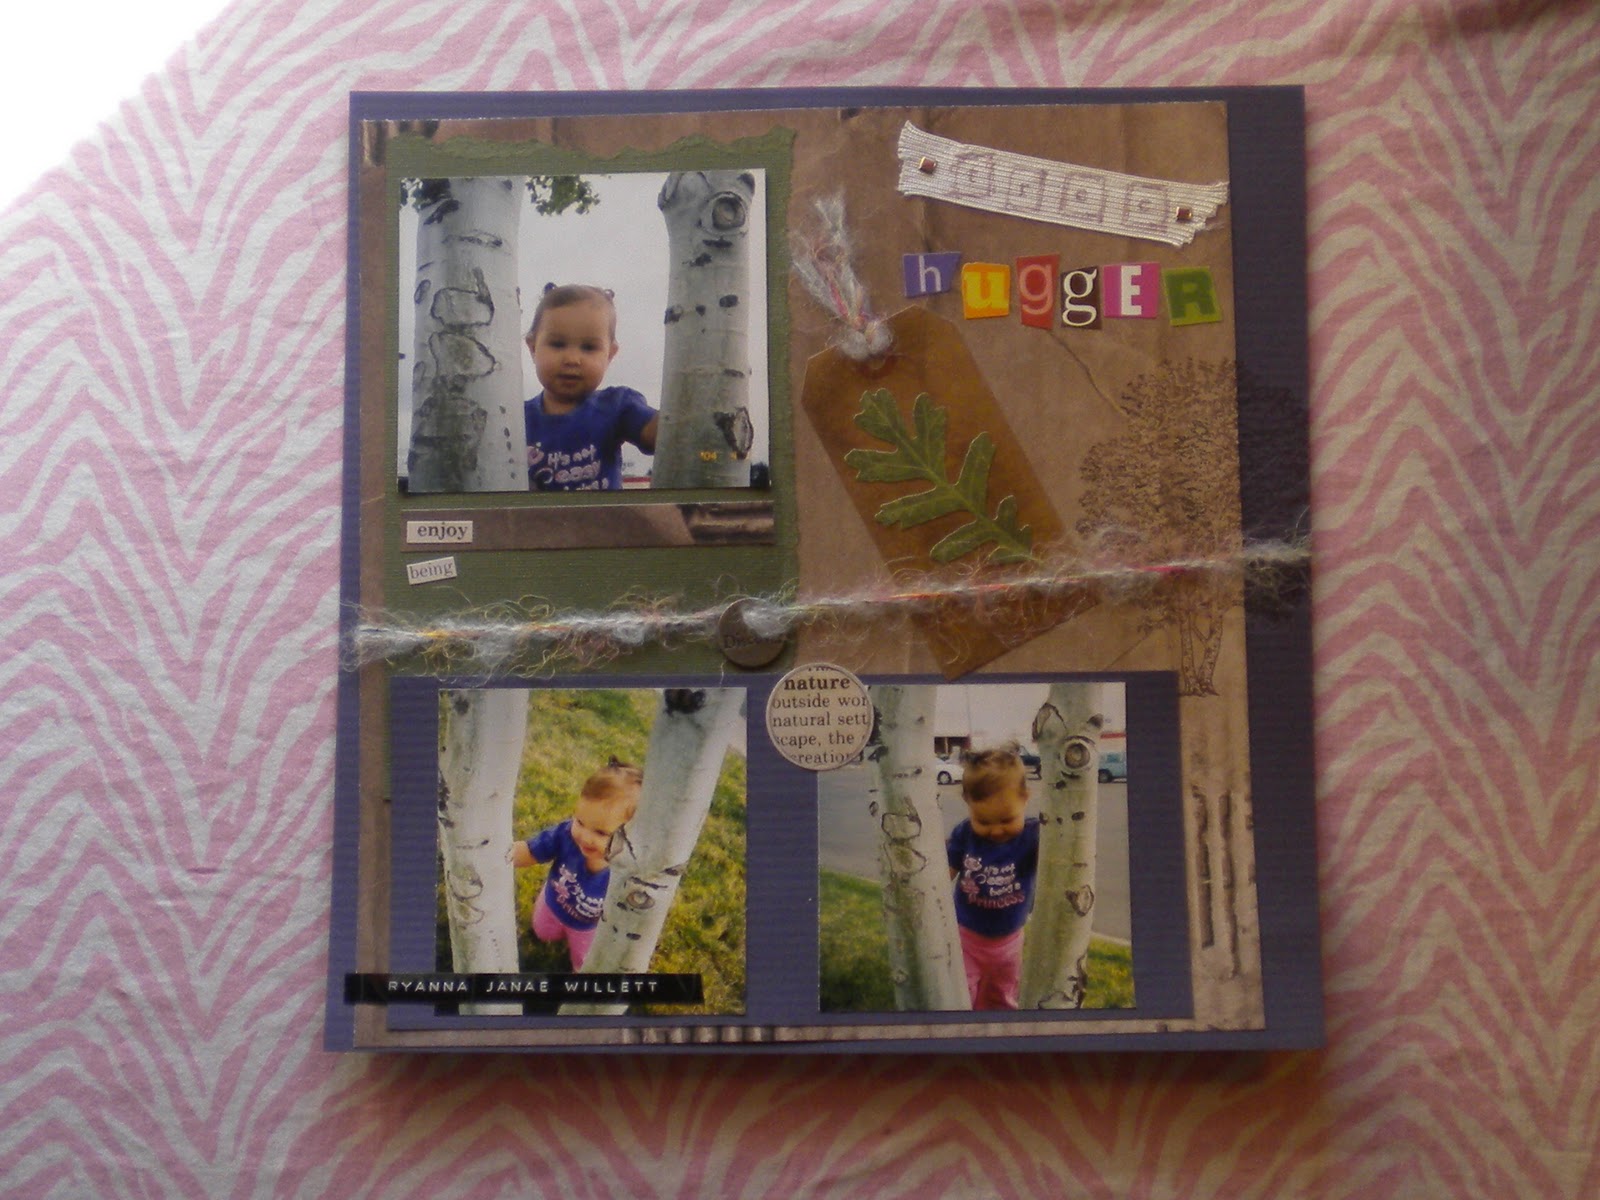
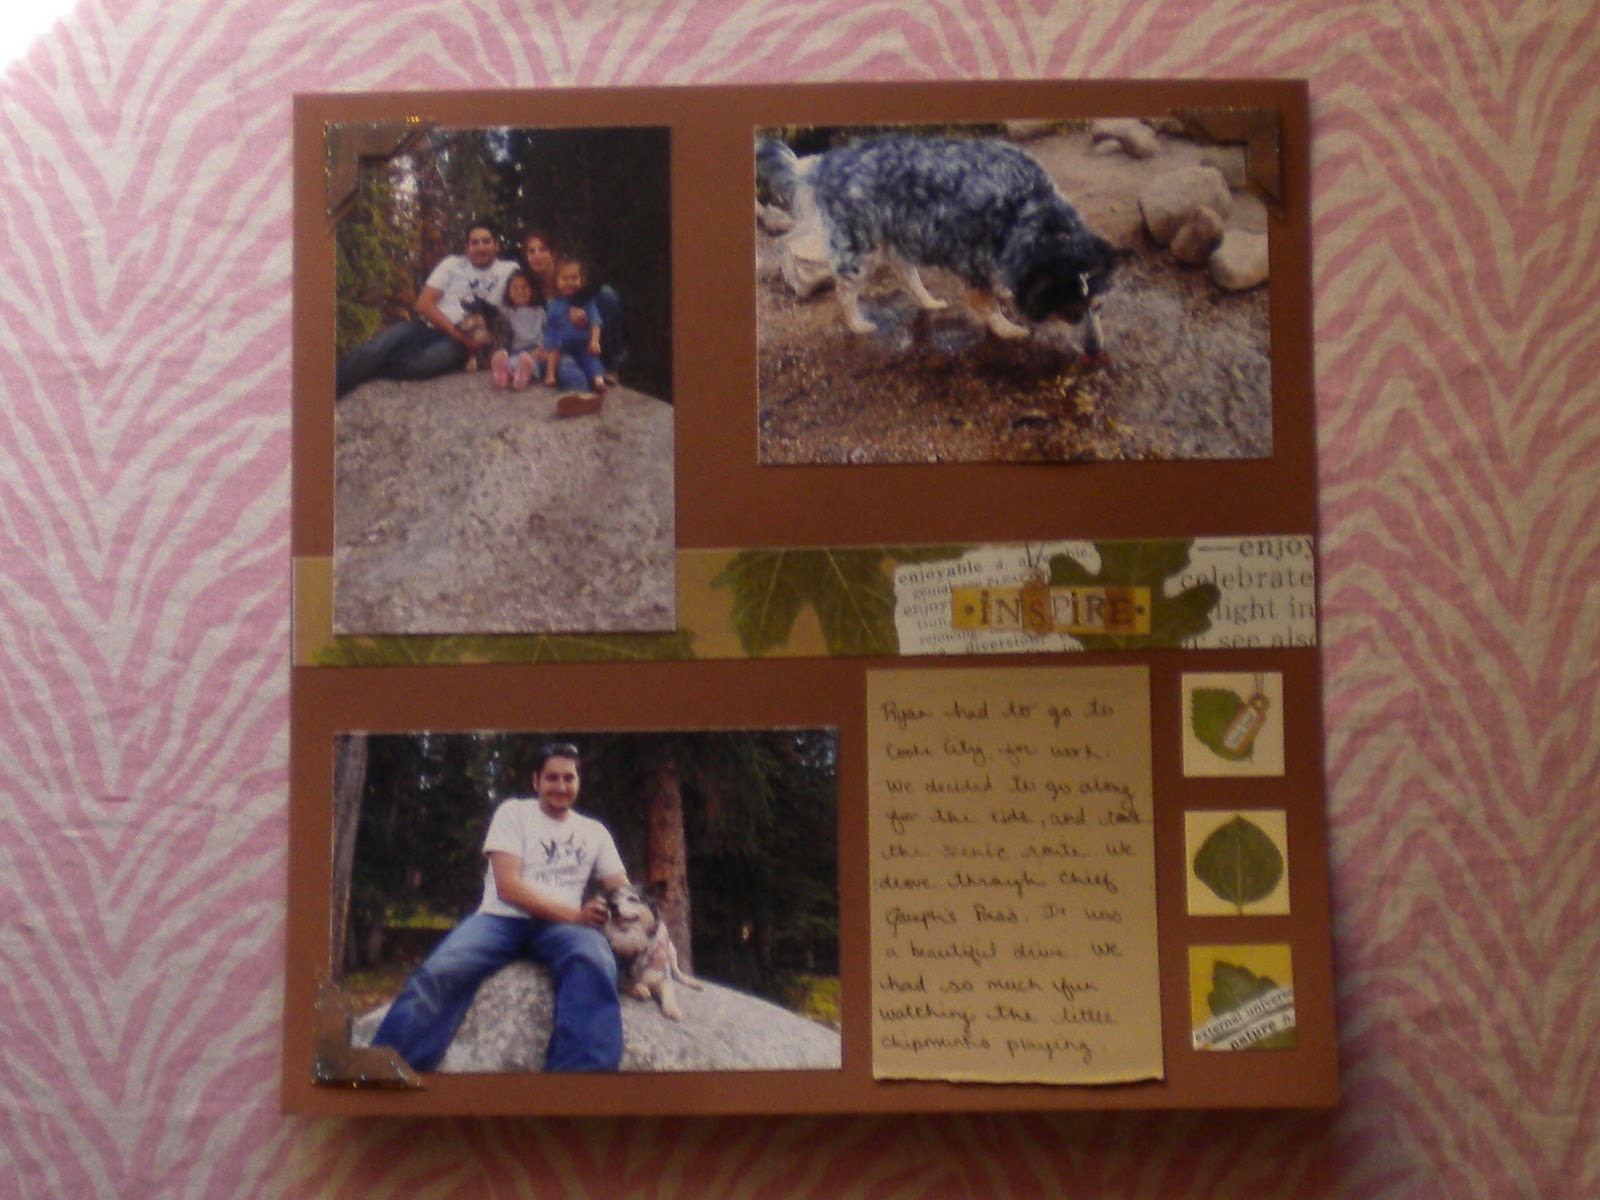
| This is a page from a class I taught. It is super simple. Just cut a 12 inch long strip, any width. Pick a word or embellishment for the center. Cut down your strips to fit evenly on each side. Snip a corner off one side, flip it over, lay it on the other corner to make sure they match, and snip it off. Punch a few holes, and tie together with any fiber. The rest is pretty self-explanatory. Just message me if you ever need more detailed instructions. |
 |
| I loved the copper paper with the pink and turquoise. I'm always looking for different color combos, and I really like this one. |
 |

 |
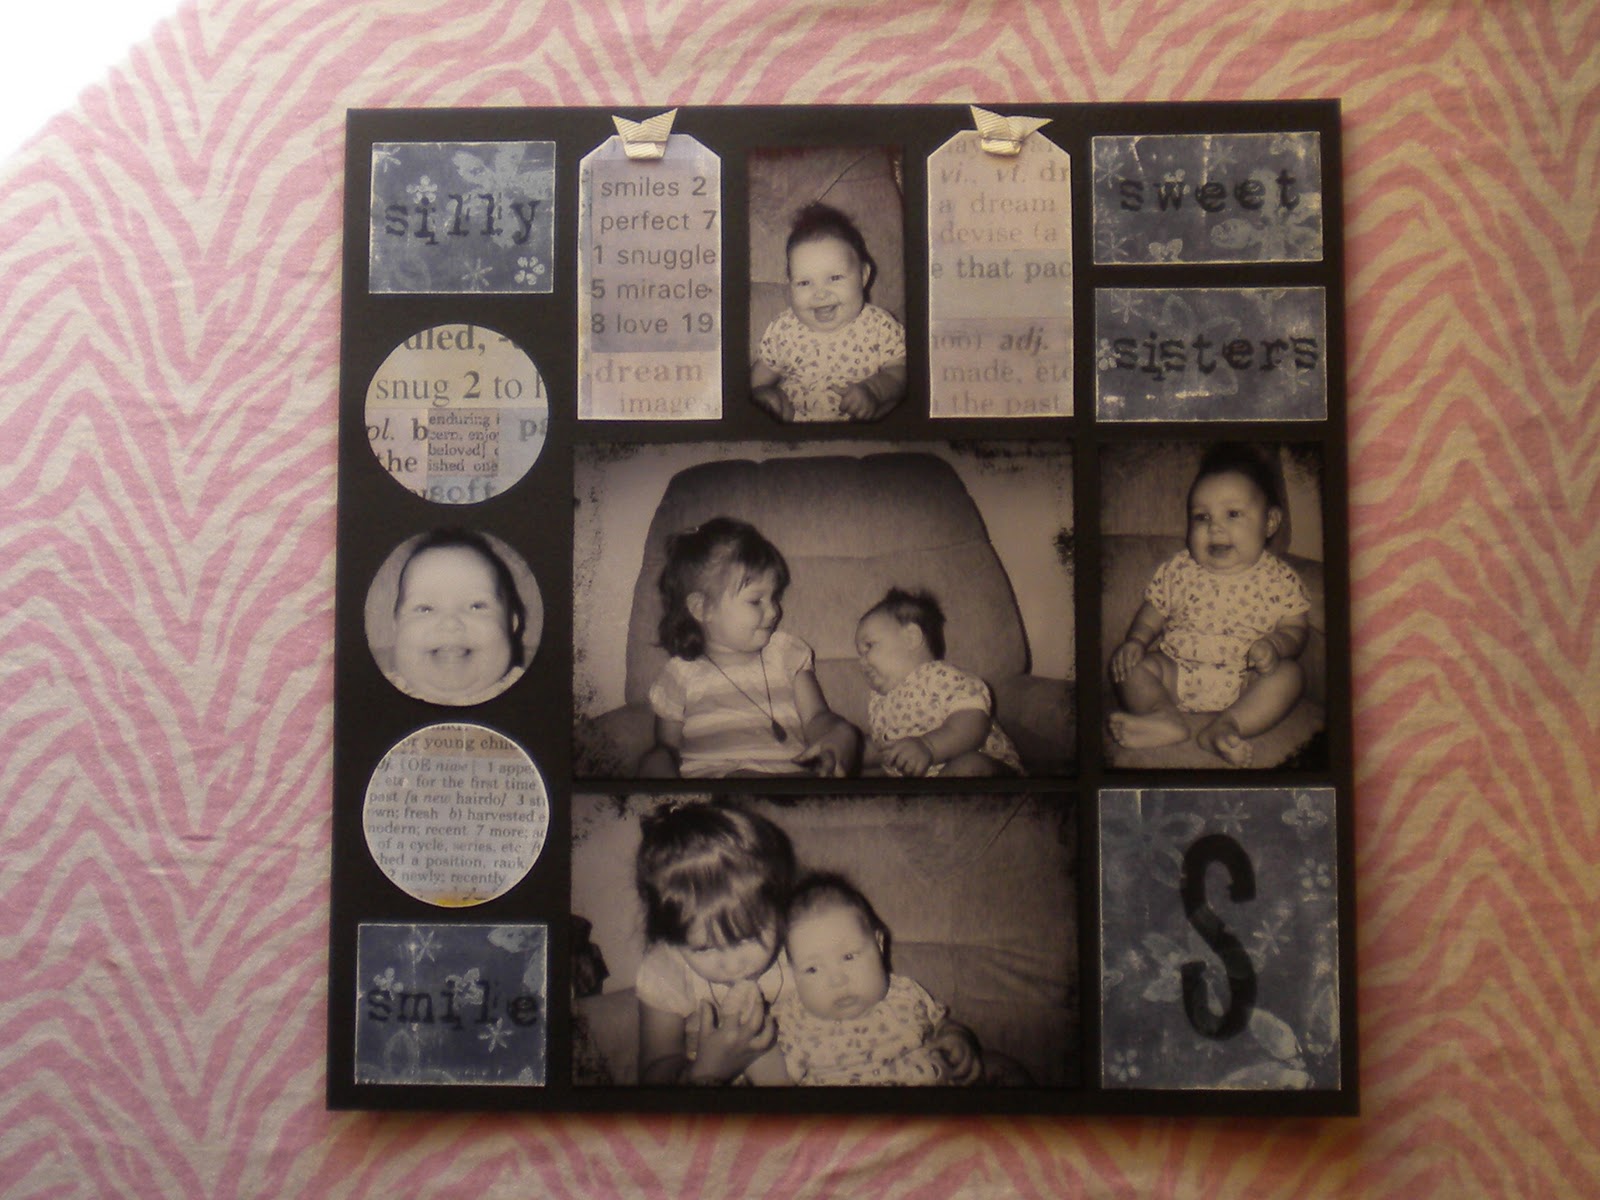
| The frame for this picture is a technique we taught at our store. It is so fun, and uses up scraps. Lay a sheet of sticker paper sticky side up, place cut up scraps all over in any pattern. Sprinkle embossing powder over all the exposed sticker paper. Heat, as always, use caution. Heat guns get VERY hot! You will be amazed with your mosaic. |
 |
| Here is a quick handmade gift for those who, like me, work well under pressure. I usually come up with a gift idea at the last minute. This is something I saw on the internet a while back, and I thought it was cute, but didn't give it another thought until Saturday night. I was at Wal-Mart, along with a million other last minute Valentine's shoppers. I saw a box of loose silk rose petals for only $2.00. I already had a bag of melt and pour glycerin soap at my house, as soap making is a hobby I've been dabbling in. It cost $6.99 at Hobby Lobby, but I used the 40% off coupon they frequently have. I also had some liquid dye and rose scent left from another project. You don't need the dye, but you could use it if you want different shades of petals. |
 |
| To make the soap petals, in a double-boiler, melt soap. I used a sauce pan, filled with water, and set a metal mixing bowl into the boiling water. I have read that once you use something to make soap, you should not use it for food prep. I'm not sure how dangerous this would actually be if you are using the melt and pour soap. Almost all hand soap contains lye, which is very dangerous all on its own, but the small amount that is in a finished bar of soap is hopefully not toxic in tiny traces. It seems all of us who wash our hands before eating might be dead by now if that were the case. ??? But, just to be safe, set aside some dishes just for making soap. After you have melted the soap, leave it on the stove on very low simmer while you dip the petals. Add some fragrance if desired. I used rose for rose petals, it only made sense. Stir the soap gently, as you don't want to make bubbles, they will show in your finished product. To dip the petals, pick up one at a time up with tweezers, then set it into the wax. Lift it back out, and set on wax paper to cool. You just want a thin layer of soap. Gently turn petals over once or twice while they are cooling to avoid clumps of puddled soap. When they are cool, they are done. They look beautiful setting in a soap dish, and are great for company, as they are single use, disposable soap. Each guest can use their own soap petal. These would be great for weddings, pretty and practical. I gave them to my daughters' teachers for Valentine's Day. I figured they might have their share of candy already. The petals would be great at school, too! A little bit of luxury for the women who are so important in my childrens' lives. These would also be romantic floating in a bath, adding beauty and fragrance. |
 |
| This is what I chose to package them in. Well, this is my second choice. I had little organdy bags, and I thought I could shoot them with a burst of steam from my iron, but it sucked the bag onto the iron and melted it instantly. I knew better! So I used sandwich bags. Cellophane bags would be much prettier, but as I said before, this was last minute. So I used what I had. I put red paper in my paper shredder to make a 'bed' for the petals. I put the paper shreds into the baggie, lay the petals on top, and tied it shut with a cute ribbon. I stamped a piece of the same red paper with 'Happy Valentine's', and wrote on the back of the tag explaining what the petals were for. |
 |
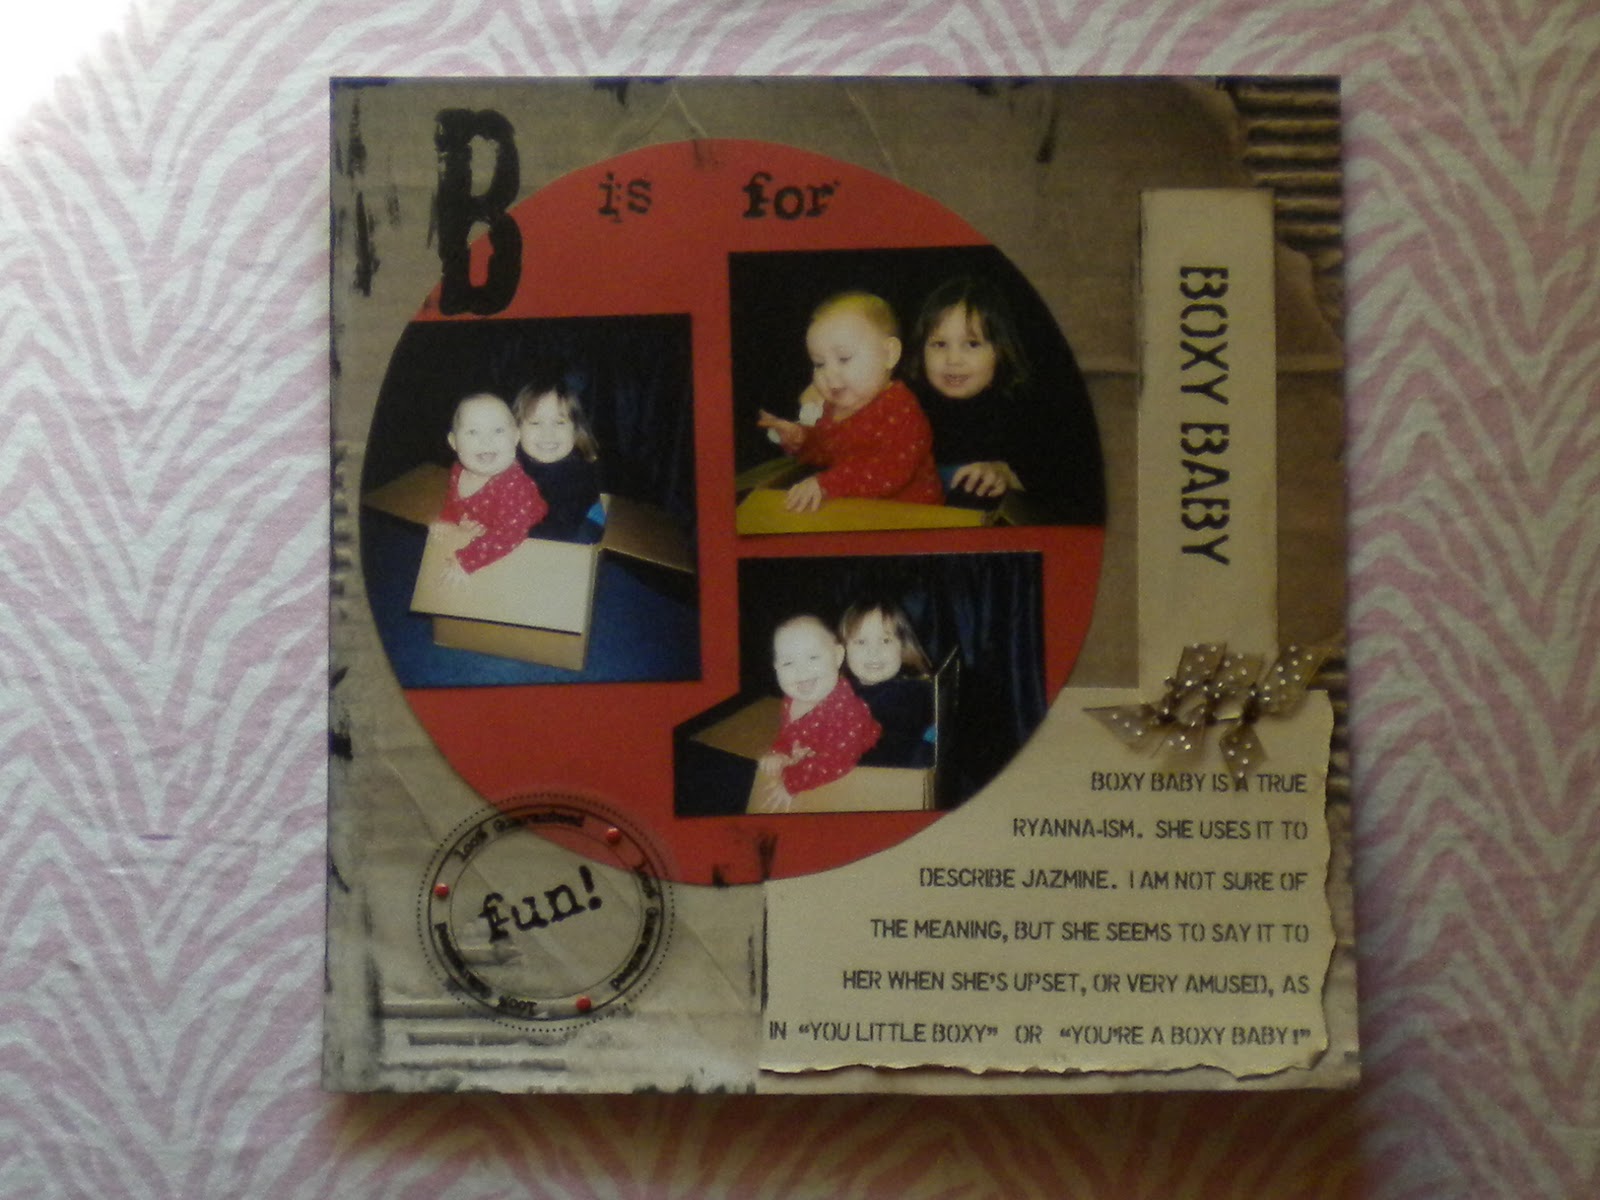
| This page came together very easily thanks to the beautiful paper. Jazzy is holding tiny baby Boomer. He is now an enormous moose of a dog, a boxer to be exact. He is so tall that he can look her right in the eye. |
 |
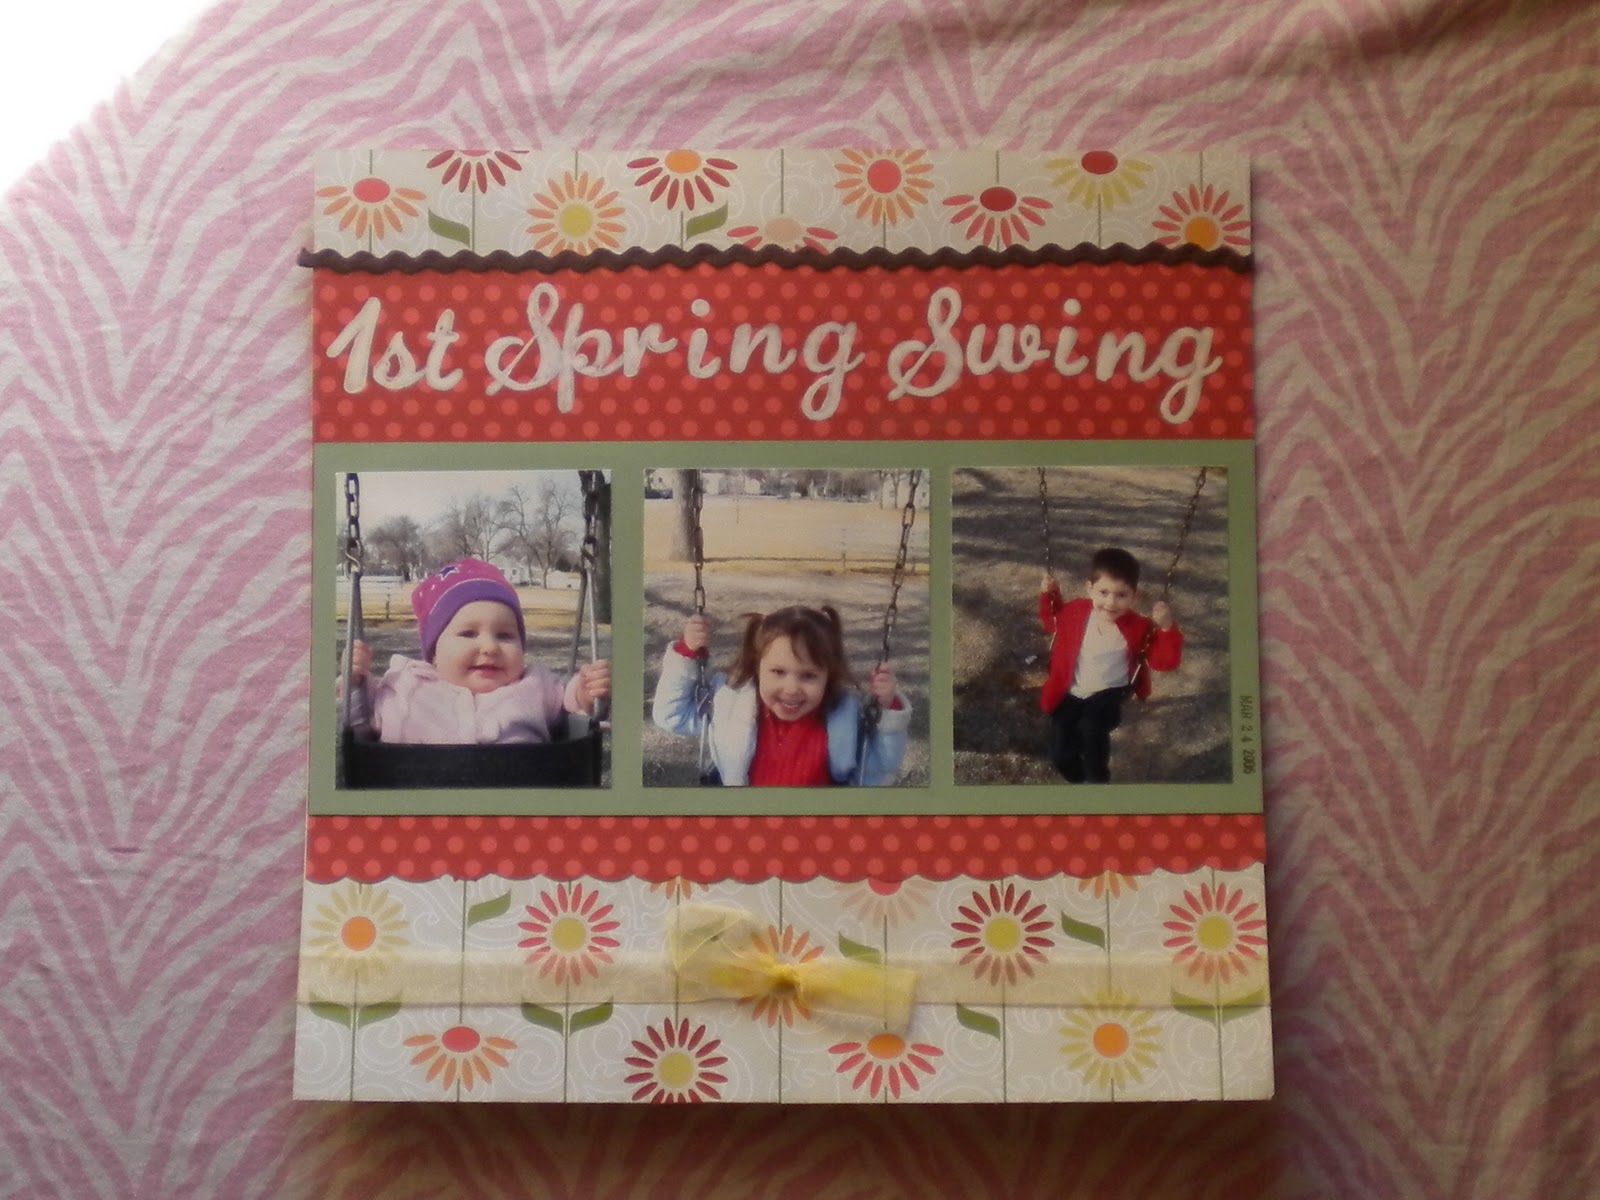
| I cut this out of another sheet, and for added dimension, adhered it with foam tape. It it layed over a vintage ribbon, which is attached with brads. |
 |
| More dimension here with the flowers and butterfly. I used oodles of paper flowers, layered a small flower over a larger one, and attached them with pink brads. The butterfly is actually two. I cut these from a patterned paper, gluing one down flat, and the second one pops by just gluing the body and bending wings up to flutter. |
  |
| This is a Zentangle, with my spin, of course. Zentangle is supposed to be this 'new' art form. But I think not. I have a feeling I'm not the only one who has been doing this since I was in grade school. But I guess it is being newly appreciated as a form of art. It is wonderfully zen. Just start drawing, doodle to your heart's content. My mom inspired this project when I saw her Zentangle. The top Zentangle pictured is hers. I loved it so much that I started my own as soon as I got home. This butterfly is made from my hands and my daughter's hands. Most of the Zentangles I saw were black and white, but I had to use my rad new Sharpies for something. They are a special edition, 80's! They have colors like legwarmer orange, banana clip yellow, and jelly pink. |
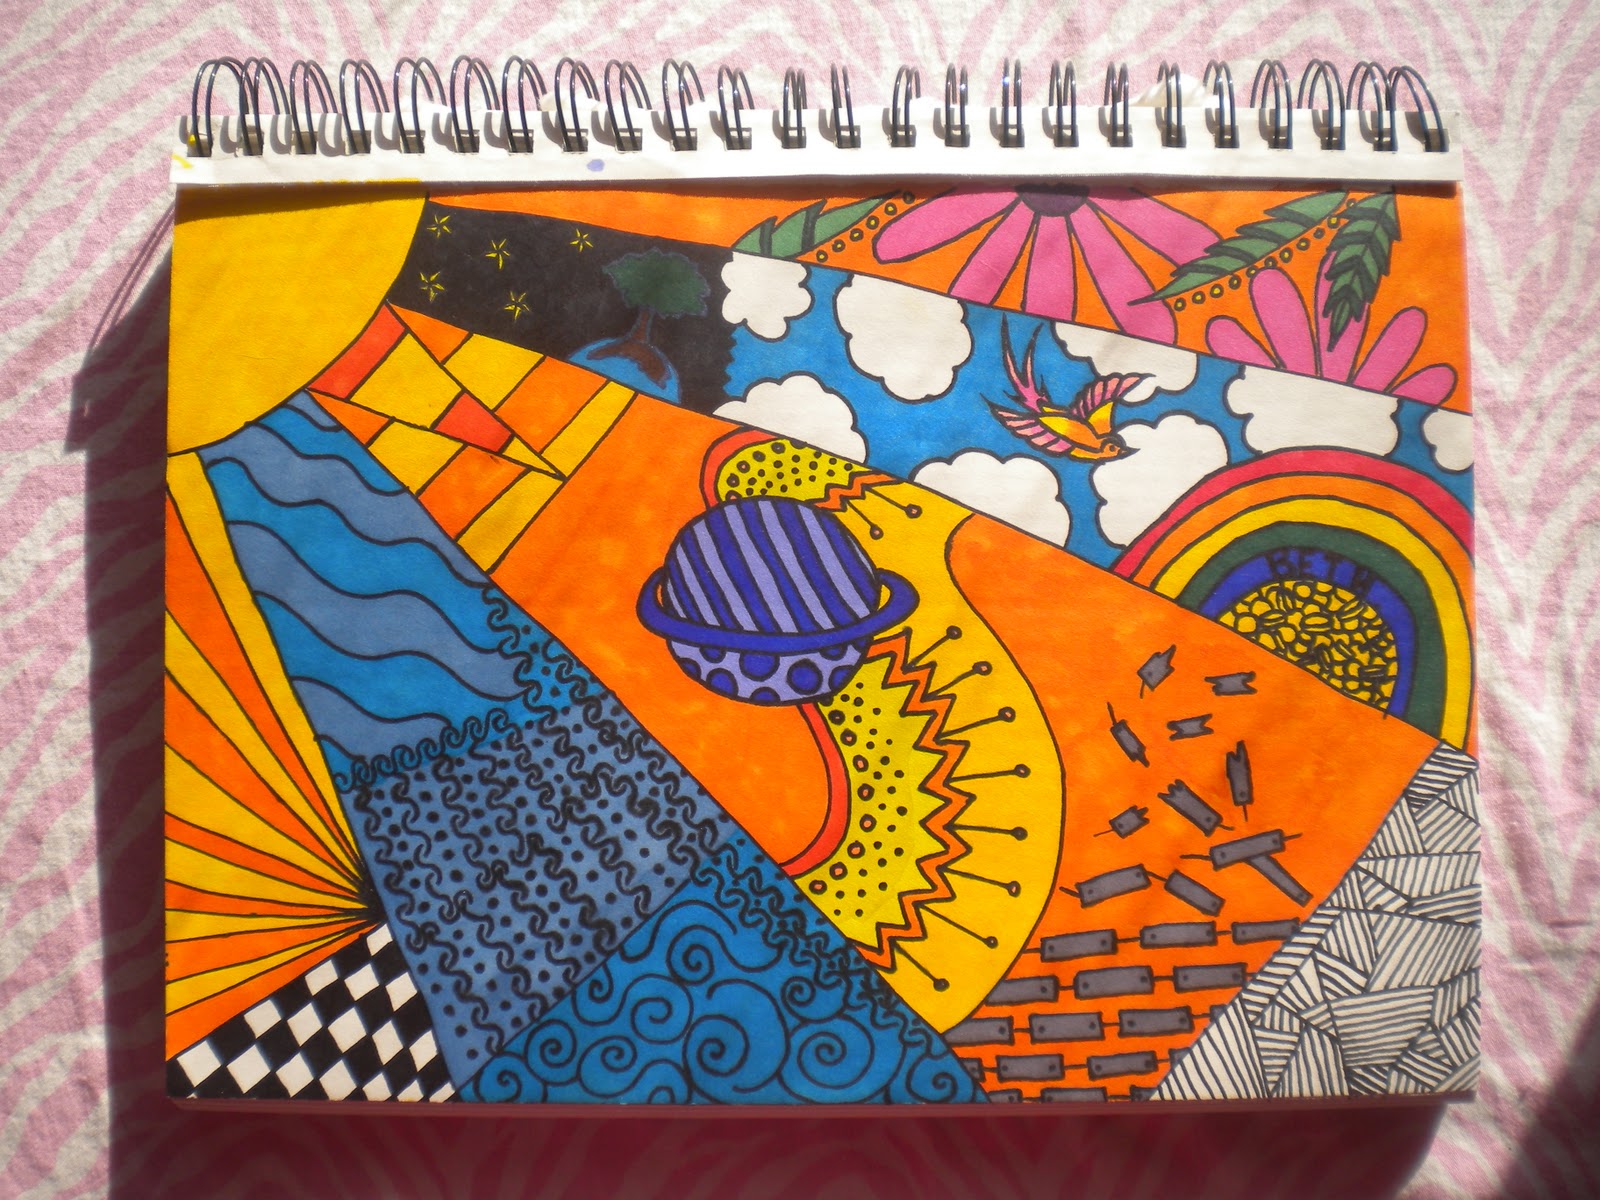 |
| Here is my second one. I highly recommend using a permanent marker so you can't erase. There are no mistakes in Zentangle! Just free-flowing creativity. Have fun and send me your masterpiece. We would all love to see it! |